
Signal Relay Hut
At the request of Marcus Ammann I have just completed designing a 2 bay Signal Relay Hut that has now been added to my shop in two Frosted Ultra Detail (FUD) versions. One version is sitting on a supporting frame and the other is on the ground. There were a number of types of these huts and this version has been produced based on a photograph and a plan supplied by a friend. The version designed is not exactly like the plan and doesn't have the gutters as the photo seems to show that they are lacking.
The plan also shows old point rods being used as cross braces between the legs so the printed frame has holes for 0.015 inch brass or phosphor bronze wire to be added if the modeler desires.
 |
| Version on Frame |
 |
| Version on Ground |
Although there is not much extra acrylic FUD material in the frame version the increase in price is due to Shapeways charging for the supporting material that is used in the 3D printing process and later washed away. The frame of course adding a lot more supporting material due to its height. I looked at having a separate frame but this didn't seem to make much difference to the Shapeways pricing.
Staffs
Quite a while ago I designed some NSWGR Staffs that the railway used for track occupancy permission. The idea is to use these on my Bylong layout along with printed tickets.
In use the Staff was given to the driver of a train and gave that train permission to use the next section of track until it was required to be handed in at the end of the section at the next signal box or station.
Staffs came in four types, at the end of each Staff was a round section within which was a hole shaped like a circle, square, triangle or a heart. Each different Staff was for a different section of track. The Staffs would repeat for the fifth section and beyond.
In support of the Staff was the Ticket. A Ticket was used when more than one train needed to use the next section of track. The first train was given a filled in Ticket to carry and hand in at the end of the section. More Tickets could be used as required for subsequent trains heading onto the same section. The Staff was used for the last train. Trains proceeding in the opposite direction could not do so until the Staff was at the other end of the section.
I believe that the Staff was also a 'key' to the Staff Box in which the Tickets were held. The Staff was used to unlock the Staff Box to gain access to the Tickets.
UPDATE: The following information was supplied by Colin Hussey.
The ordinary staff and tickets had colour associated with the head, you will notice the colour of the respective boxes and the cutout shape of the head, that cutout represented the colour that was also the colour of the tickets for the applicable staff and the section that it corresponded with.
Heart - Green
Round - Red
Triangle - White
Blue - Square
The staff opened the appropriate safe working box, no key on end meant no sidings in the section, whereas a key on the end was to unlock points.
UPDATE: The following information was supplied by Tom R.
The staff boxes typically have a hole for the staff on both sides of the box to allow the staff to be slid into the box, the annett key (if the section requires it for working intermediate sidings) on the end of the staff would pass through and protrude out the other side of the box, most of the photos you have posted above shows that the staff with a key is longer than the box is wide.
A staff for a section can only open each of the two (2) boxes for that section to obtain a ticket if required. There was / is a box at each end of a section.
A staff from another section cannot open a box from another section, this explains the corresponding staff head symbols and colours ( the colour was also stamped / written on the shaft of the staff as well on some staves).
This was also another part of the safe working methodology in order to prevent over running the section with an incorrect staff as it would not be able to assist the train crew with working of intermediate sidings in the section nor open the staff boxes
My understanding (willing to stand corrected) is the staff can only enter the box from the right hand side when facing the box. The lugs on the shaft of the staff varied in their position and they corresponded with the unlocking mechanism of the particular section / staff boxes in order to open the box to obtain a ticket if required, again another safe working protection.
The NSWR document covering the use of the Staff and Tickets can be found here: NSWR Using Train Staffs
A PDF with 4 NSWGR Single Line Tickets can be found here: NSWGR Single Line Tickets
 |
| Note key on end of the staff |
 |
| Another staff with key |
 |
| Staff without key on end |
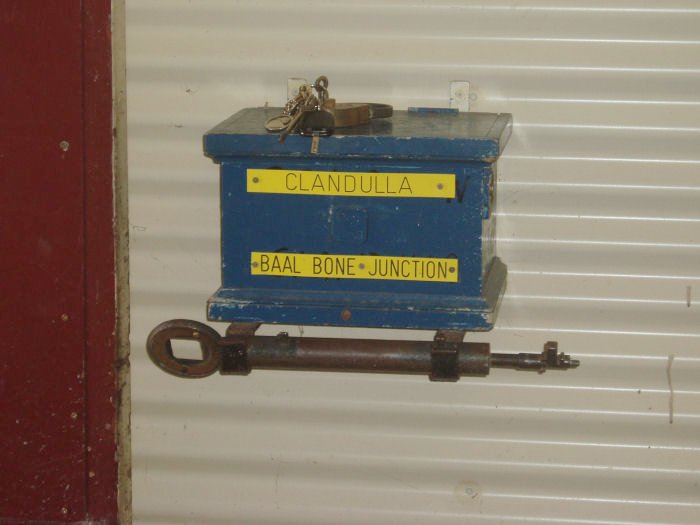 |
| In this photo there seems to be a place on the top of the right hand end to insert the staff to open the lid of the staff box to access the tickets |
I apologise to the owners of the above photos as I don't know who they are and hope that they don't mind this use of their photos.
I have two size staffs available, a small version that is 82 mm long and a larger version that is 116 mm long. The large version has a hole designed into the 'key' end of the staff to accommodate a 3 mm stereo plug that can be wired in different ways to act as an electrical switch if required.
The model Staffs have tabs along their length that could be used in a small Staff Box made from say MDF. The tabs can be used with appropriately placed micro switches in the Staff Box to electrically 'unlock' the Staff Box. The tabs are in different places on each of the four different staffs.
Here are some computer renders of the 'model, staffs.
 |
| Small - 'Model' Staff |
 |
| Large - 'Model' Staff showing hole in end |
Steel Post Signal Detail Parts
As you may know I designed a single steel post brass NSWGR Signal and placed it on my Signals Branch shop a while ago. I also did the platform starter bracket signal found at the Sydney end of the Werris Creek platforms for Ron Cunningham's Werris Creek layout.
 |
| Brass Steel Post Signal with WSF Base and FUD Ladder |
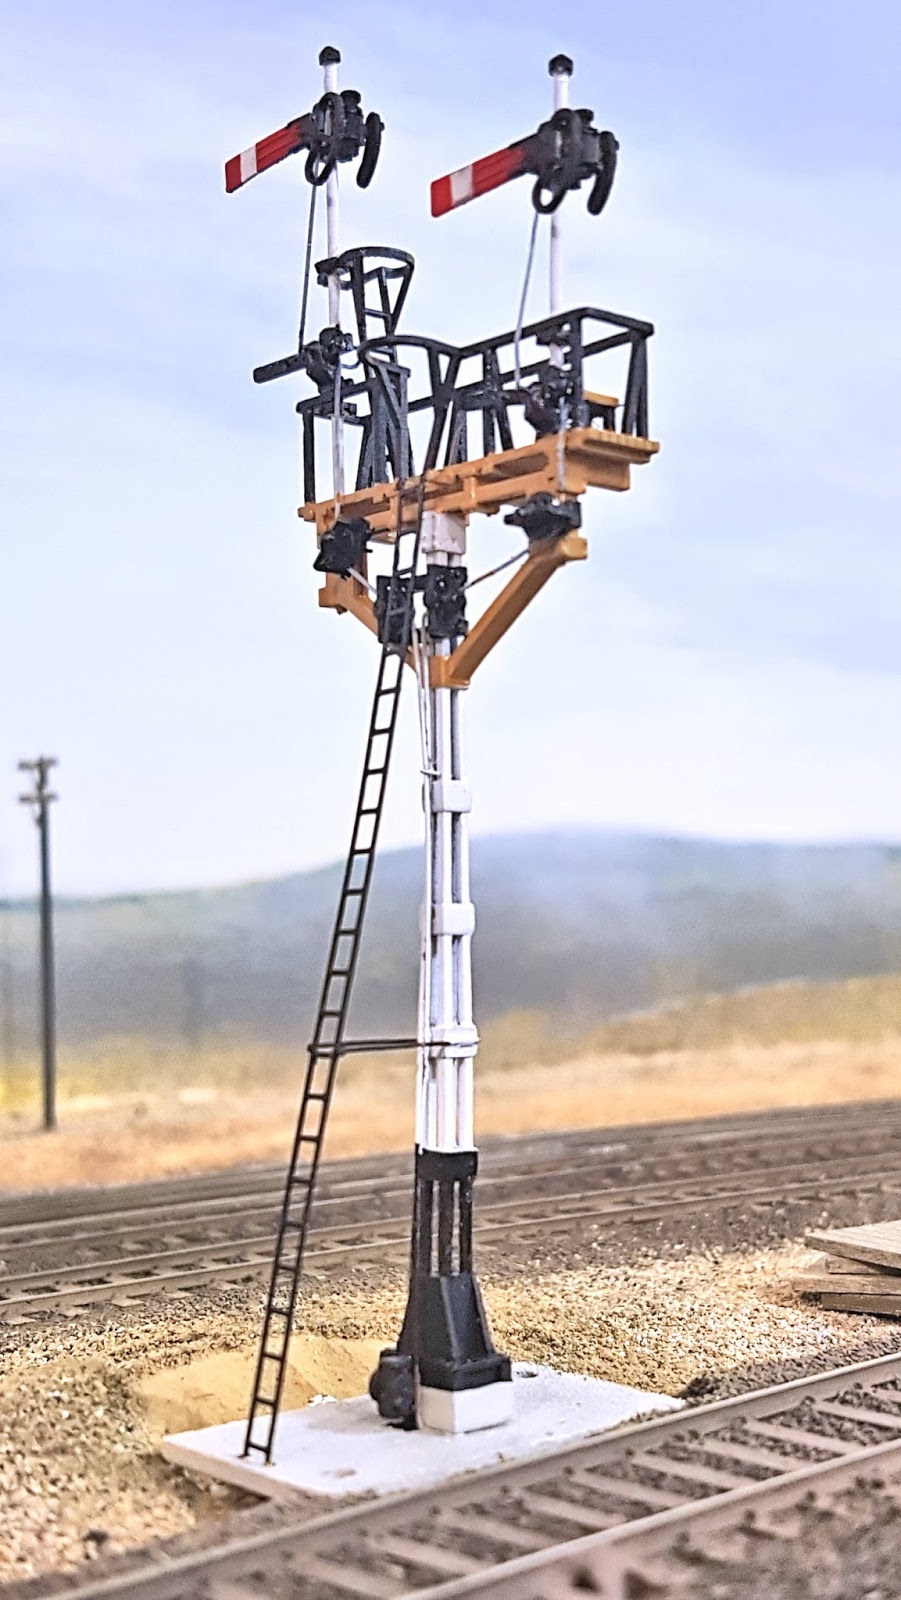 |
| Brass Werris Creek Bracket Signal with FUD Details and WSF Base |
The delay in designing more signals was due to the lack of suitable telescopic round tubing for the posts. At first I used some 1 mm Albion Metals brass tube for the Werris Creek bracket signal dolly posts but the next larger size for the lower section on a single signal wasn't available, hence the lost wax cast version mentioned above.
Recently I found some Ngineering brand stainless steel telescopic tubing that would work, at the Model Railroad Craftsman shop at Blacktown NSW. The tubing is not on the on-line shop so a phone order or visit would be needed.
The Ngineering web site does have an online shop however and I found that the shipping would be US$10.
The Ngineering product numbers for the tubing are:
Ngineering 0.042 inch stainless steel tubing - N2042-2 (2 pack) or N2042-4 (4 pack)
Ngineering 0.050 inch stainless steel tubing - N2065-2 (2 pack) or N2065-4 (4 pack)
I have designed the detail parts for Frosted Ultra Detail (FUD) acrylic material so that they can be slid onto the tubing to make a particular signal. Unfortunately, due to minimum wall thickness design limits it is not possible to make these parts in the 3D printed lost wax cast brass process from Shapeways. Anyway the brass parts can't be soldered to the stainless steel tubing.
The tubing is quite thin walled and Ngineering has tips on cutting the tubing on their web site.
I have designed a set of FUD detail parts for a single post signal with a 36 inch arm and also a set of extra post detail parts with 4 of each part but no signal bases for those modelers who want to make a signal with multiple arms, etc.
 |
| Single Steel Post Signal Parts Set |
 |
| Different View of Parts Set |
In addition I have added the Werris Creek Bracket Signal and associated FUD detail parts for it to the shop.


